Wednesday 29 October 2008

Week 6-8: December Snow Scene:

Snow Terrain and Atmosphere:

What I was thinking of for the terrain and atmosphere of this setting was a basic snow terrain which will have the Christmas tree situated in the centre of the terrain with snow falling around it. I had originally wanted to add presents underneath the tree as well but with the time restriction I may decide against it.

Terrain:

For the snow terrain, I started off by creating a ‘Plane’ (shown below).

Next, I wanted to increase the number of ‘segments’ on the plane in order to edit the plane more effectively and in more detail. (20 - 30 segments are preferred).

I followed on from this by going to the ‘Modifier list’, selecting ‘editable poly’, click on ‘soft selection’ and finally selecting each poly I want to extrude, and modify the plane until I am happy with the layout.


After I moulded the plane to the shape I wanted I went about giving the plane a more Sno wy texture. I did this by going into 'Material Editor' to create a material texture that would best suit the look of snow. I decided to go for a 'Noise Map' seeing as it looked very authentic and snow like. An example is shown on the right.


Atmosphere:

For the atmosphere of the setting I experimented with different particle effects for the falling snow and decided that a ‘triangle’ would be best for snow since it is smaller and looks more like a particle when using a ‘Motion Blur’ on it. Also, to give the effect of really heavy snow.

I applied a blizzard setting and rotated it so that the angle of the falling snow looked better. (I did this because Snow never falls perfectly straight).

Next I began tinkering with a fog effect just to make the scene to appear cold and also to increase the effect of the snow falling around the setting.


Background:

For the background I was thinking of using a traditional forest back drop which I could create by cloning the model of a tree similar to the design of the main Christmas tree around the edge of the ‘Snow Terrain’.

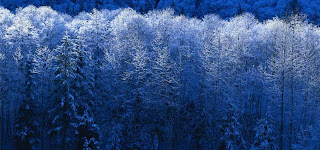
I actually created the background by taking an existing image on my computer and adding it to the snow_terrain.max file (Below is the background image).

I did this by first going to the ‘Rendering’ drop down menu, selecting ‘Environment’, scroll down to ‘Environment Map’, double click on ‘Bitmap’ and select the image file I wanted to use.

After having done the background for the snow scene I ended up with the below finished product.

I feel that the above image is good as it is and so, I have changed my design idea and have opted not, to add a Christmas tree, presents and tinsel.

Wednesday 22 October 2008

Week 5: Learning 3D Studio Max Tutorials:

I found the lecture this week a bit confusing and new. This is due to our regular lecturer being away ill so the lecture was taken by Jo Bowman, who is an expert with 3D Studion Max.

We covered several tutorials, including 3D modeling (Boolean and Lofting), materials (how to apply multiple textures and materials to a 3D model, e.g. a teapot).

Tutorial 1: Boolean:


Monday 20 October 2008

Week 4: Starting Assignment: December

December:

For the December month I thought of doing a

winter scene with a Christmas tree in the centre. The tree will probably be decorated with tinsel.

Christmas tree:

I have implemented a rough design model of the Christmas tree I which I mentioned in the ‘Week 3’ post on the blog. (Found here http://3dricharddar.blogspot.com/2008/10/week-3-fruit-bowl-tutorial.html ). The draft design model is

shown just below:

I achieved this design by first creating the foliage and trunk.

I created the foliage by creating 4 separate ‘Cone’ shapes (Shown left), resizing each ‘Cone’ and then stacked on top of each other to give a layered effect.

After positioning each of the cones into place I grouped them together and named the new model ‘tree1’.


The trunk of the tree was just a basic cylinder shape. I resized it and changed the colour to an earthy brown. I then moved the grouped ‘tree1’ down onto the cylinder and grouped them together to create a new group, ‘tree2’.

I made the plant pot next. First, opening a new file and creating an ordinary box, right clicked on the box and converted it to ‘editable poly’. I went into the selection list on the side bar selected the ‘polygon’ tool, selected the top face of the box and resized that face on its own to create slanted pot shape (shown to the right).


After creating the pot shape I wanted I clicked on ‘File’ went down the list to ‘Merge Files’ and opened the ‘Tree2.max’ file and added the pot to the tree file and grouped them all together. (Shown right).

To complete the Christmas tree draft I added a golden star at the top of the tree.


What I did to make the star was go into ‘Shapes’ select ‘Star’, created the size star I wanted, went to ‘Modifier list’ and down to ‘Extrude’.

Afterwards, I made another cone, made both the cone and stars colour gold and grouped the two together, after positioning them correctly.

Finally, I saved the star.max file, went to ‘File’ selected ‘Merge Files’ and added the star to the tree2.max file to create the finished draft.

Wednesday 8 October 2008

Week 3: Fruit Bowl Tutorial contd./Assignment ideas

I completed the draft version of the fruit bowl tutorial today. It's a little rough, but not too bad for a first attempt. ^^

Assignment Idea:

The months i'm planning on doing are July, September and December. I have a slight idea of what I wish to do for the months I have chosen. The months I have chosen to represent are:

July - For July I plan to do a summer theme, posibly eaither a beach ball or/and a bucket and spade.

September - what I have in mind for September is an autumn theme showing a 3D modle of a tree having lost it's leaves. The leaves, of which, are on layed on the ground and woud be coloured a variety of browns, reds and yellows or a combination of those 3 colours.

December - For this month I was thinking about the obvious theme of Christmas. With, again, a 3D model of a tree, but decorated with Christmas decorations, i.e : tinsle. The tree would also be planted within a plant pot of which I would either create by shaping a cuboid or by using the "Lathe Tool".

Sunday 5 October 2008

Week 2: Fruit Bowl Tutorial

In this session I found that both I and the lecturere were beginning to get to grips with 3D Studio Max a little bit better. I started on a tutorial of vreating a 3D fruit bowl and fruit inside it. What I found, was, as I worked through the Tutorial, I found that I interacted with interface and tools of the software more easily. It took me a while to create an "Apple" with the software and found it gradually easier when moving on to a "Pear" and "Banana".

I am yet to finish the tutorial however, but I am sure that I will be able to finish it during the next lab session of 3D Studio Max.

Wednesday 24 September 2008

Week 1: Intro to 3D Studio Max

I found the first session of Introduction to 3D Studio Max to be a little confusing. This is mainly due to being new to this particular piece of software. I found it hard to listen to the lecturer as he explained about the module. This was due to being seated at the back of the room.

For next session it would be better for me to arrive earlier in order to be able to hear the lecturer more clearly and thereby get a better understanding of what I need to do in that session.

I also feel that I may have to have a chat with the lecturer next session for him to go over parts of the last session which I missed out on.

Richard Dutton